How To - Setup User Caller ID

This article will show you how to do the following.

    • How to enable Caller ID for specific Users.

Methods:

 Smart PBX Method
  1. Login to the Audian Portal.
  2. Click the 9 square button at the top right of the screen.
  3. Click on Users on the left.

  4. Click on the User Features box for the preferred user.

  5. Click on Caller-ID Number.

    • Note: A telephone number must be assigned to the user prior to enabling the Caller-ID feature.
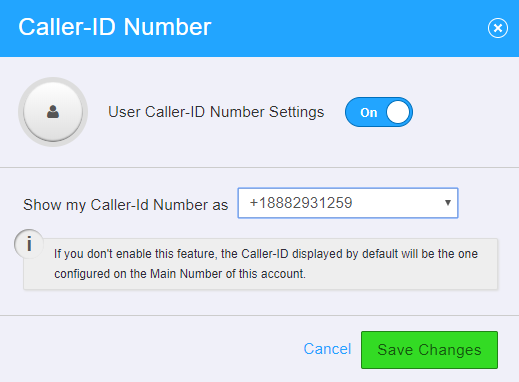
  6. Click the User Caller-ID Settings toggle switch to On.
  7. Click the drop-down box and select the preferred number to appear on outbound calls.

    Note: This can be any number that is assigned to the account instead of just the number assigned to the user.
  8. Click Save Changes at the bottom,


 Callflows Method

Important: For most accounts, it is not necessary to set the Caller-ID settings at the user level in Callflows, this is now done in the SPBX app. If Caller-ID is set via CallFlows, leave notes on the account in SPBX.

  1. Login to the Audian Portal.
  2. Click the 9 square button at the top right of the screen.
  3. Click on the Callflows app.
  4. Click User.

  5. Select the desired User from the list on the left.

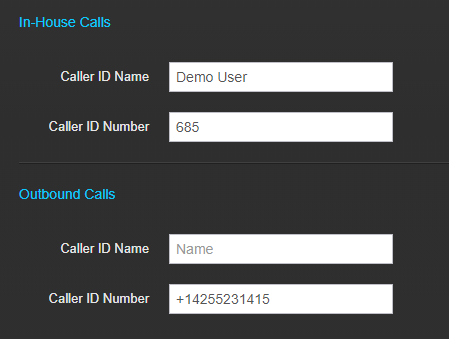
  6. Set the desired Caller ID Name for both In-House calls and Outbound calls.

  7. Scroll down, and click Save.