Call Flow - Setup
- David Klein
- Eric Ronhovde
Description:
Methods:
Description: This section outlines how to assign a phone number to be the Main Number.
- Login to the Audian Portal
- Click the 9 square button at the top right of the screen.

- Click on the Smart PBX app.
- Click Main Number on the left.
Click Add from Spare Numbers.
- Select the number(s) that apply, and then click Add selected numbers.
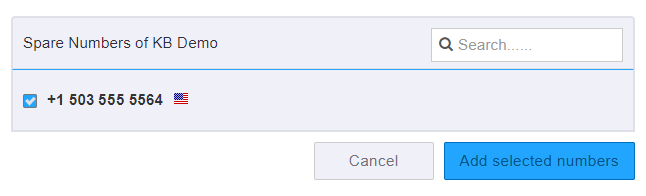
- If you do not see the number, please contact Audian at 844-611-6110 opt 2.
Description: This section outlines how to build your main number call flow, but this guide can also be used to create other call flows such as the After Hours menu or Holiday menu.
- Login to the Audian Portal.
- Click the 9 square button at the top right of the screen.
- Click on Callflows, then click on Callflows once more.
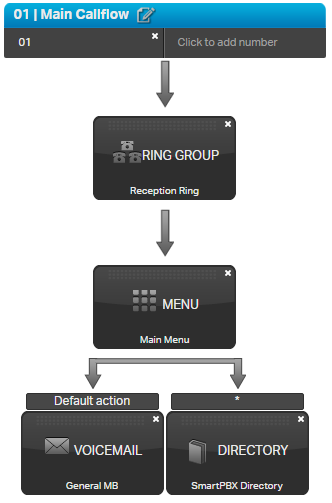
- Click Add Call Flow on the left and build the main call flow.
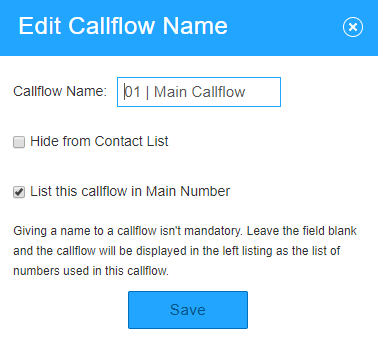
Click the paper and pencil edit button, and then name the call flow using the naming format below.

- 01 | Main Callflow
- 02 | After Hours
- 03 | Holiday
- 04 | Emergency or Temp Forward
- Check List this callflow in Main Number, and then click Save.
- This will allow you to assign the callflow in the Incoming Call Handling section of Smart PBX.
- This will allow you to assign the callflow in the Incoming Call Handling section of Smart PBX.
- Now we add the extension by clicking the Click to add a number section.

- You can dial that extension at any time to access this call flow and re-record the greeting.
- Select the phone number from the drop down box or select Extension and enter a number, and then click Add.
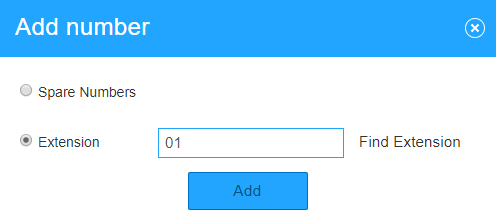
- Note: Clicking Find Extension will show you a list of all of the currently assigned extensions for this account.
- Build out the rest of the call flow by referencing the following articles.
- Click on the Save Changes button.
Description: This section outlines how to enable call flows for your Open, Closed, Lunch, and Holidays.
- After Hours and Lunch call flows can only be set after the Open/Closed hours are set.
- Holiday call flows can only be defined once Holidays is enabled in the Holiday section.
- Login to the Audian Portal.
- Click the 9 square button at the top right of the screen.
- Click on the Smart PBX app.
- Click Main Number located on the left.
- Click on the Incoming Call Handling button.

- Select one of the Hour tabs.

- Select the Advanced Callflows dropdown and select the call flow you would like enabled.
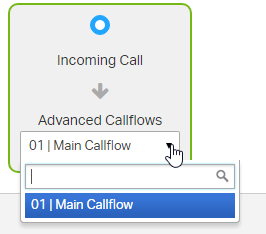
- Click the Save Changes button at the bottom.
Description: This section outlines how to set up your business open and closed hours for your call flow when your in and out of the office.
- Login to the Audian Portal.
- Click the 9 square button at the top right of the screen.
- Click on the Smart PBX app.
- Click Main Number located on the left.
- Click Office Hours Strategy.
Choose either 24 hours Open Office or Custom.
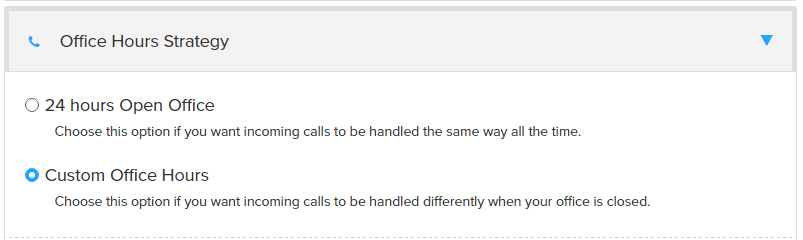
- After selecting Custom Office Hours, a day of the week and time frame will open.
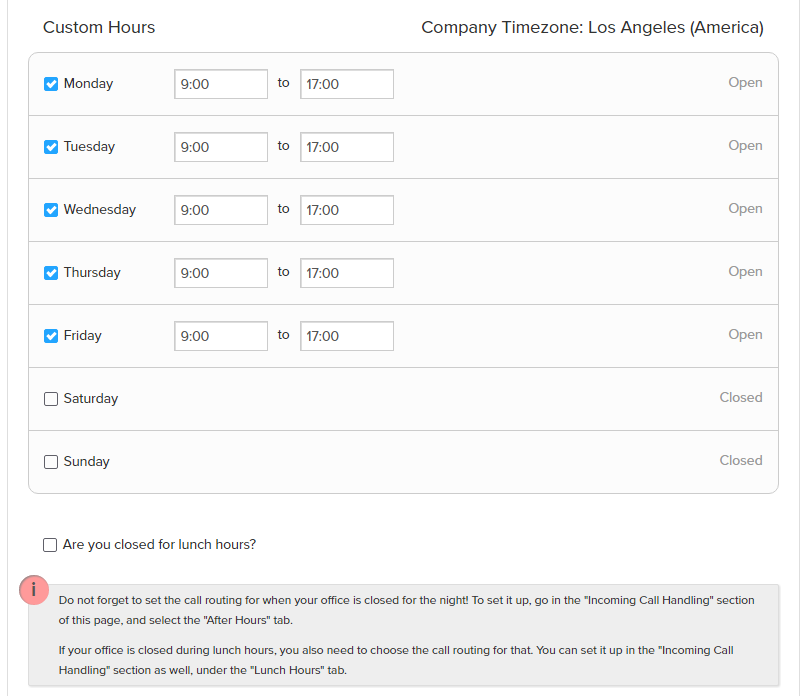
- If your office closes for lunch, select Are you closed for lunch hours? and then set the time window.
- Click on the Save Changes button.
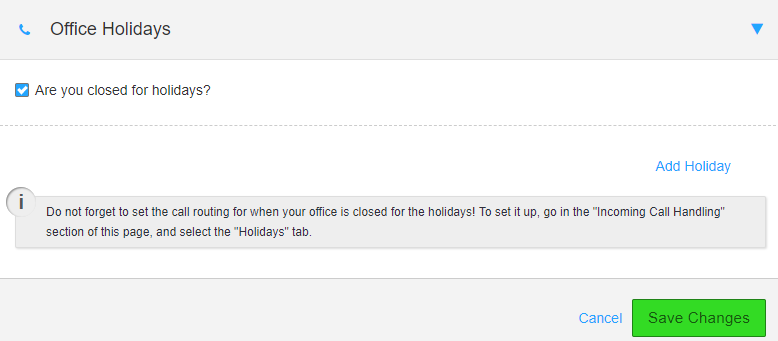
Description: This section outlines how to set up a holiday schedule.
- Login to the Audian Portal.
- Click the 9 square button at the top right of the screen.
- Click on the Smart PBX app.
- Click Main Number located on the left.
- Click Office Holidays
- Check the box that says Are you closed for holidays?
- Click Add Holiday.
- Select the preferred type of Holiday event to be created.
- Single Day - Select a specific date to be closed.
- Date Range - Select a start and end date.
- Advanced - Allows for options such as 3rd Tuesday of March to be set.
- Fill In the specified holiday info.
- Click on the Save Changes button.