How To - Change Transport Options (TCP, UDP, NAPTR Settings)

Description:

By default, all of our SIP signaling has been done over UDP in the past.  As more features in the VOIP space get added, SIP packets are becoming inherently larger in size.  The RFC recommendation is to not fragment UDP SIP packets and to ensure anything over 1480 bytes is sent using an alternative protocol.  In our instance we have implemented the ability to change individual devices and accounts over to TCP signaling in order to alleviate any issues we see around UDP packet fragmentation.

This article will show you how to do the following.

  • Adjust the Transport settings on the Account and User/Device levels.

Available Transport Options

  • Account Default – This option is only available at the device level and tells the system to use the value set at the account level.  This is the default option for devices.

  • NAPTR UDP – This is the default option which uses UDP signaling and a NAPTR record for proper failover.

  • NAPTR TCP – This is the best option for TCP signaling which maintains a NAPTR record for failover yet switches to TCP.

  • Realm UDP – This uses UDP signaling pointed at the realm, failover will not be enabled with this.  This can be useful for devices that do not support NAPTR records.  Most all devices do, however, we’ve added this in case we run into this in the future. This selection is only available for SuperAdmins as it disables failover.

  • Realm TCP – This uses TCP signaling pointed at the realm, failover will not be enabled with this.  This can be useful for devices that do not support NAPTR records. This selection is only available for SuperAdmins as it disables failover.

Methods:

Identify a Problem

Fragmented UDP packets often do not cause a problem, but this is entirely dependent on the client’s network infrastructure.  Because not all SIP packets are the same size, so far, we’re mostly seeing this happen on specific events that create the largest packets.  If you start to see a client that has any of the following problems, it makes sense to see if this is the problem they’re running into.

  • Internal transfers do not ring the other person’s phone or fail.
  • Intercom from one device to another does not work correct.
  • Incoming calls do not ring devices on new clients or after network changes have been made.

The easiest troubleshooting steps is to simply set a couple of their devices to TCP and see if that resolves the problem.  For more in-depth troubleshooting, a packet capture can be performed to see if INVITE packets are greater than 1480 bytes in instances of failure.

 Device Level Transport Options
  1. Login to the Audian Portal.
  2. Click the 9 square button at the top right of the screen.
  3. Select Smart PBX from the apps list.
  4. Click Devices on the left.

  5. Click the Wrench icon next to the device to be edited.

  6. Select Advanced, and then click Network Settings.

  7. Under the Transport Method drop down menu, select the preferred transport option.

  8. After selecting the appropriate Transport method, click Save and Restart.

 Account Level Transport Options
  1. Login to the Audian Portal.
  2. Click the 9 square button at the top right of the screen.
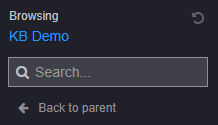
  3. Click the Account icon, and select Back to parent for the account to be edited.
  4. Click the Apps icon, and then click Account Mannager app.
  5. Select the account you wish to make changes to from the list on the left.
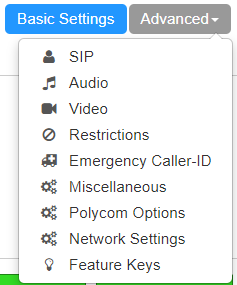
  6. Click Provisioning.
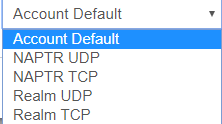
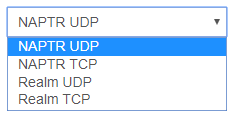
  7. The current default Transport type will be displayed in the drop down menu, select this and choose the preferred option.
  8. Click Save Changes and have users reboot their phones, either manually of mass reboot via SmartPBX > Devices.