| Tip | ||
|---|---|---|
| ||
This article will show you how to do the following.
|
Methods:
...
| icon | false |
|---|
...
| title | Smart PBX Method |
|---|
- Login to the Audian Portal.
- Click the 9 square button at the top right of the screen.


- Note: A telephone number must be assigned to the user prior to enabling the Caller-ID feature.
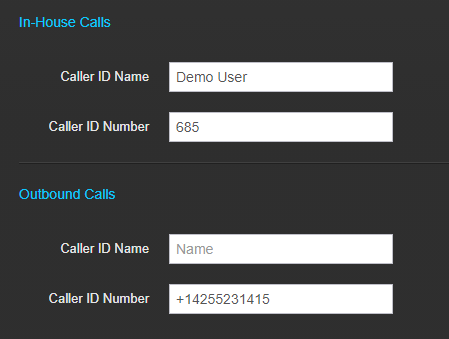
- Click the User Caller-ID Settings toggle switch to On.

- Click the drop-down box and select the preferred number to appear on outbound calls.
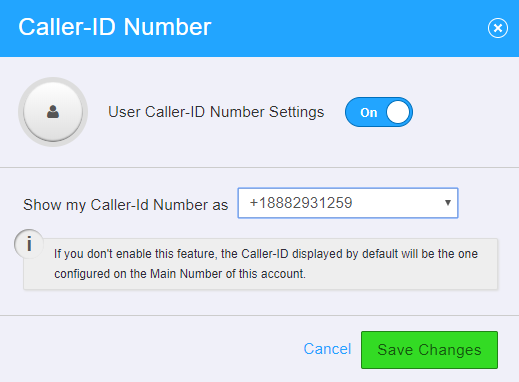
Note: This can be any number that is assigned to the account instead of just the number assigned to the user. - Click Save Changes at the bottom,
...
| icon | false |
|---|
...
| title | Callflows Method |
|---|
| Warning |
|---|
Important: For most accounts, it is not necessary to set the Caller-ID settings at the user level in Callflows, this is now done in the SPBX app. If Caller-ID is set via CallFlows, leave notes on the account in SPBX. |
...
| Tip | ||
|---|---|---|
| ||
This article will show you how to do the following.
|
Methods:
| Info | |||||
|---|---|---|---|---|---|
| |||||
|
...
| Info | |||||||
|---|---|---|---|---|---|---|---|
| |||||||
|
...